Setelah melakukan instalasi Consul Server dan Consul Client, Selanjutnya Anda dapat menambahkan atau mendaftarkan service untuk keperluan monitoring.
Agar mudah dipahami. Simulasi kali ini akan mencoba menambahkan service nginx dengan port 80 ke Consul Client.
Setup nginx.
1
docker run -dit --name web-1 nginx
Register service
Buat file web-1.hcl lalu edit seperti berikut.
1
2
3
4
5
6
7
8
9
10
11
12
13
14
15
service {
  name = "webserver"
  id = "web-1"
  tags = ["v1", "v2"]
  port = 80

  check {
    id =  "web-1",
    name = "check web-1",
    service_id = "web-1",
    tcp  = "ip-web-1:80",
    interval = "1s",
    timeout = "1s"
  }
}
Define multiple checks
1
2
3
4
5
6
7
8
9
10
11
12
13
14
15
16
17
18
19
20
21
22
23
24
25
26
27
28
29
30
service {
  name = "check-mk"
  id = "svc"
  tags = ["share"]
  port = 80

checks = [
  {
    id       = "svc-80"
    name     = "check http"
    tcp  = "127.0.0.1:80",
    interval = "1s",
    timeout = "1s"
  },
  {
    id       = "svc-21"
    name     = "check ftp"
    tcp  = "127.0.0.1:21",
    interval = "1s",
    timeout = "1s"
  },
  {
    id       = "svc-53"
    name     = "check dns"
    tcp  = "127.0.0.1:53",
    interval = "1s",
    timeout = "1s"
  }
]
}
Define initial health check status
1
2
3
4
5
6
check = {
  id = "mem"
  args = ["/bin/check_mem", "-limit", "256MB"]
  interval = "10s"
  status = "passing"
}
enable-script-checks dan enable-local-script-checks perlu disetting saat setup agent
Register dengan perintah
1
consul services register web-1.hcl
Reload consul
1
consul reload
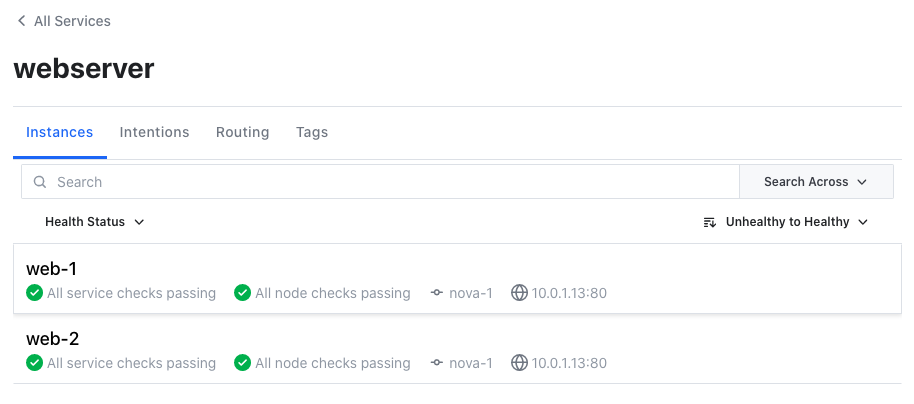
Cek service melalui WebUI Consul